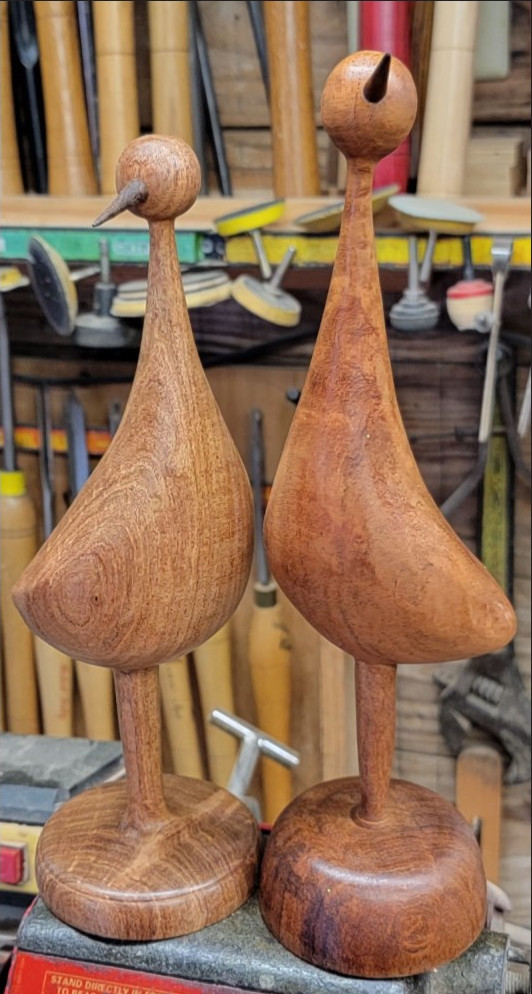
Story and photos by Waukeene Vinson
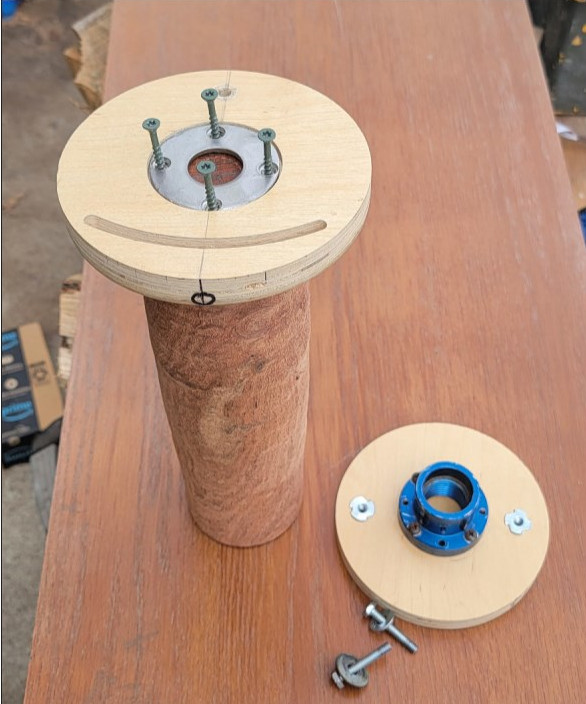
This offset jig will give you about a 3/4″ offset each direction of the center line. I chose to drill the tenon hole 1-3/8″ in diameter. It could be larger or smaller. The 1-3/8″ works out well to have enough wood to attach a 2-1/2″ to 3″ diameter turning blank with 4 screws to hold it securely.


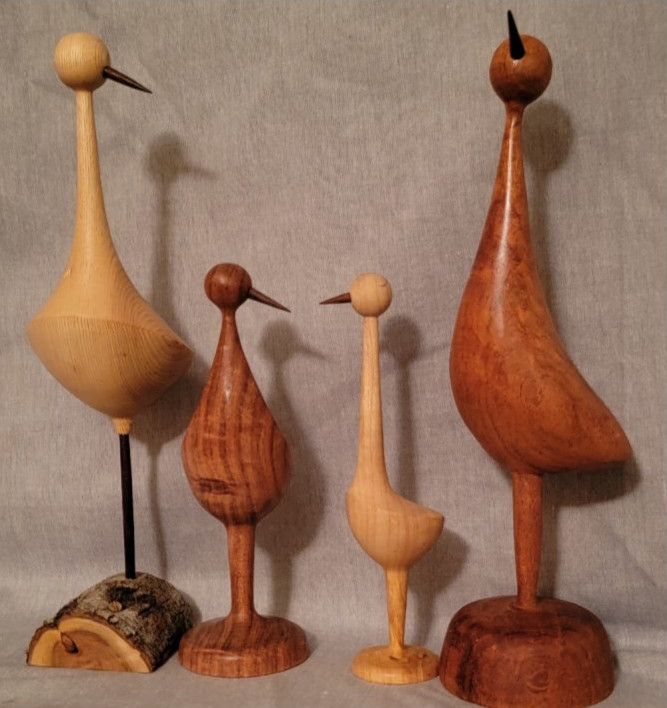
Crane step by step:
- Attach turning blank to jig using four wood screws, attach jig face to jig base using two bolts and washers.
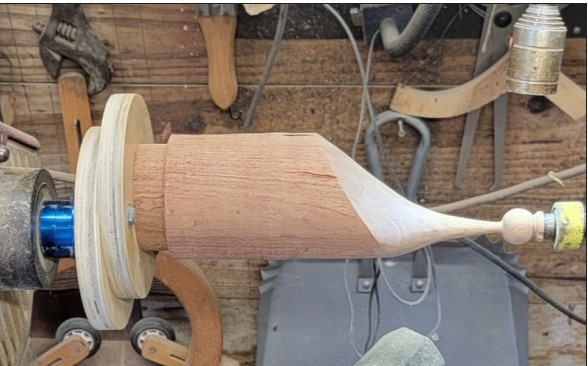
- Offset jig to one side, turn head and neck.
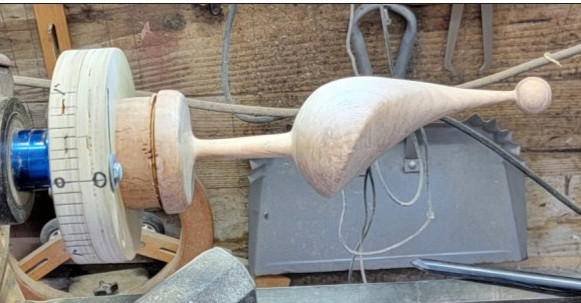
- Center the piece on the jig, turn body, leg and base.
- Swing the crane back to the offset to drill the hole for the beak while the head is supported by the tailstock.
Sand each section as it is turned!
Material List:
- 2 ea. 6″ dia. 3/4″ Plywood
- 2 ea. 1/4″ x 1-1/2″ bolt
- 2 ea. 1/4″ Washers
- 2 ea. 1/4″ x 20 TPI T-Nuts
- 4 ea. # 8 x 1-1/2″ to 2″ Wood Screw