
This APP is intended to help you quickly determine the dimensions you need to cut segments to create a segmented project. This tool uses the formulas given in Bob Grinstead’s tutorial/demo on making a segmented bowl.
To use the APP, you:
- Specify the number of layers you want the project cut into.
- Identify how many segments you want in a layer.
- “draw” the outline of the project.
- Overlay the segment layers on the project outline.
- Look to the bottom of the page to see the segment construction information.
Click HELP for more HOW TO details.
Help
This application can be used to help you design the parts for you segmented project. Provide some
initial information, create the walls of the vessel and a report will be displayed that suggests
reasonable values that you can use to create trapezoidal segments for each layer.
To use this app:

- Use the slider “Worksheet Height” to select the “size” of the paper you would like to “draw” on.
- Use the slider “Project Height” to estimate the height of your project.
- Use the slider “Layer Count” to identify how many layers you would like in your project.
- Use the slider “Segment Count” to idientify how many segments you would like in each layer.
- Choose whether you want an open segment or close segment project estimated.
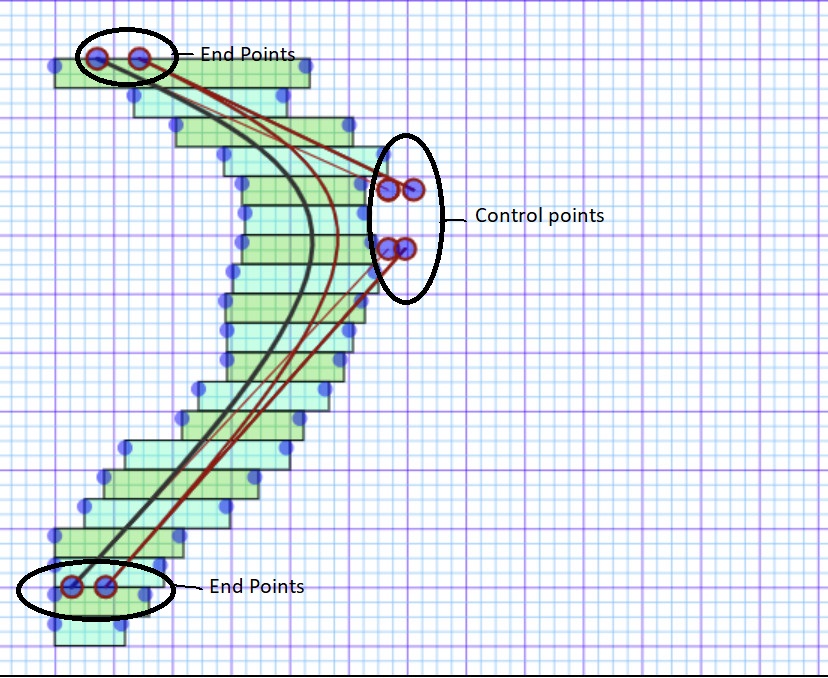
- Two lines are provide on the graph. Move the endpoints to where you would like the project to begin and end.
- Move the control points to get the shape of the project you would like. By the time you are done, you will
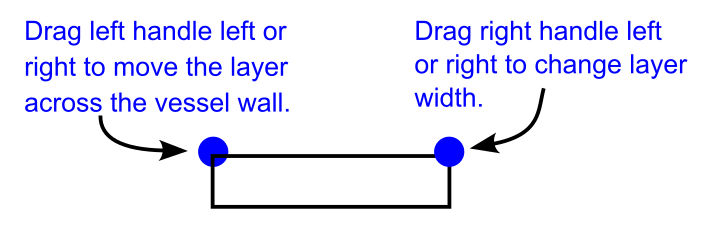
have something that looks like the inside and outside surfaces of the project, for one side. - Completing the outline, move each layer left or right to overlap the project walls. Click and hold the left dot,
then, drag left or right to move the layer rectangle. - Once positioned, adjust the width of each layer to encompass the walls of the project and have enough excess for
gluing. To size the layer, click and hold the right dot, then, drag left or right to move the rectangle to size. - Once you have aligned layers with overlap and coverage of the walls, scroll down to see the layer design estimates.
When you’ve looking at layer information at the bottom of the page, notice the picture on the right explains what portion of the trapezoidal shape segment the values match.
WARNING: The outer radius is measured from the left edge of the graph to the right edge of each layer.
Note: If your drag fails in the above description, try double clicking the dot before trying to drag the point.
Note: Your hollow drawing may not use all the layers estimated were needed in your project. Layer 1 is the top layer, Layer N is
the Nth layer from the top. If layers appear below the walls of your hollow, either ignore the cut information for those layers,
or understand that those would represent the bottom of your hollow. You may or may not want to ignore cutting those layers.
Please give the worksheet height, project height and segment count,
then, one of the following:
- Layer count
- Layer height
-
Nothing yet. px. -
Nothing yet. in. -
Nothing yet. in.
Nothing yet.-
Nothing yet. -
Nothing yet. in. -
Design Statistics
- Facts will go here.
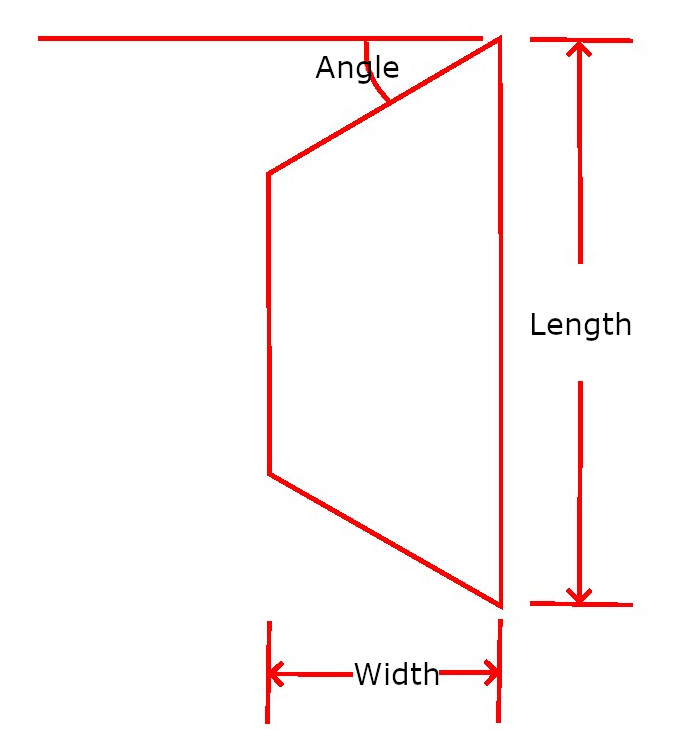
WARNING: the outer radius is measured from the left edge of the graph to the right edge of each layer.