

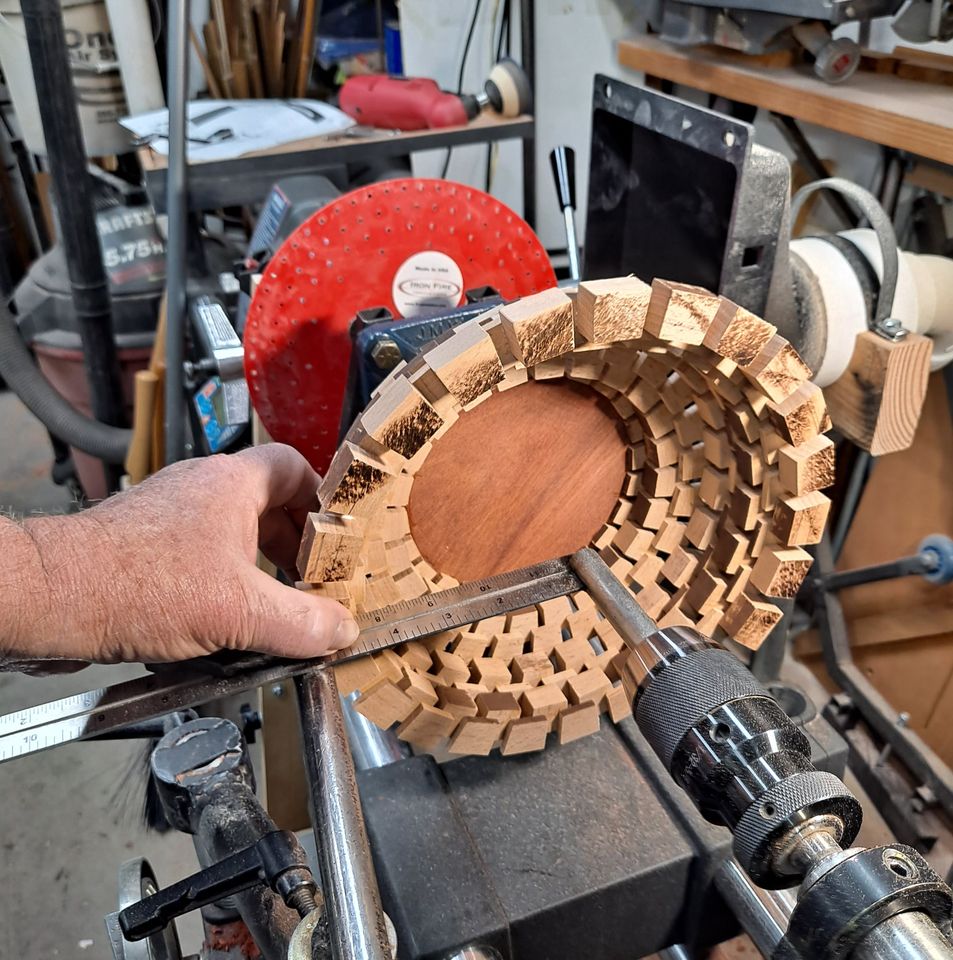
When creating my segmented project, I used a special jig to position segments. Someone asked to have the jig posted on the web site. This is the jig.
I can’t take credit for the original idea. It came from “Earl’s Small Segment” shop on youtube.
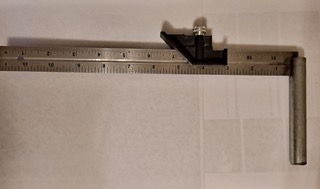
I made my jig from a $5 combination square and a 5/8 piece of round stock. There are lots of other ways to make it.
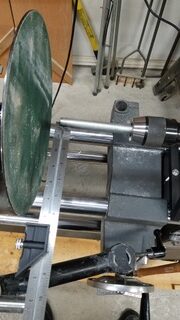
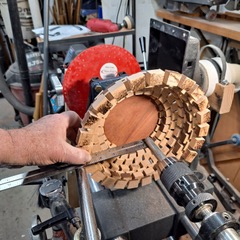
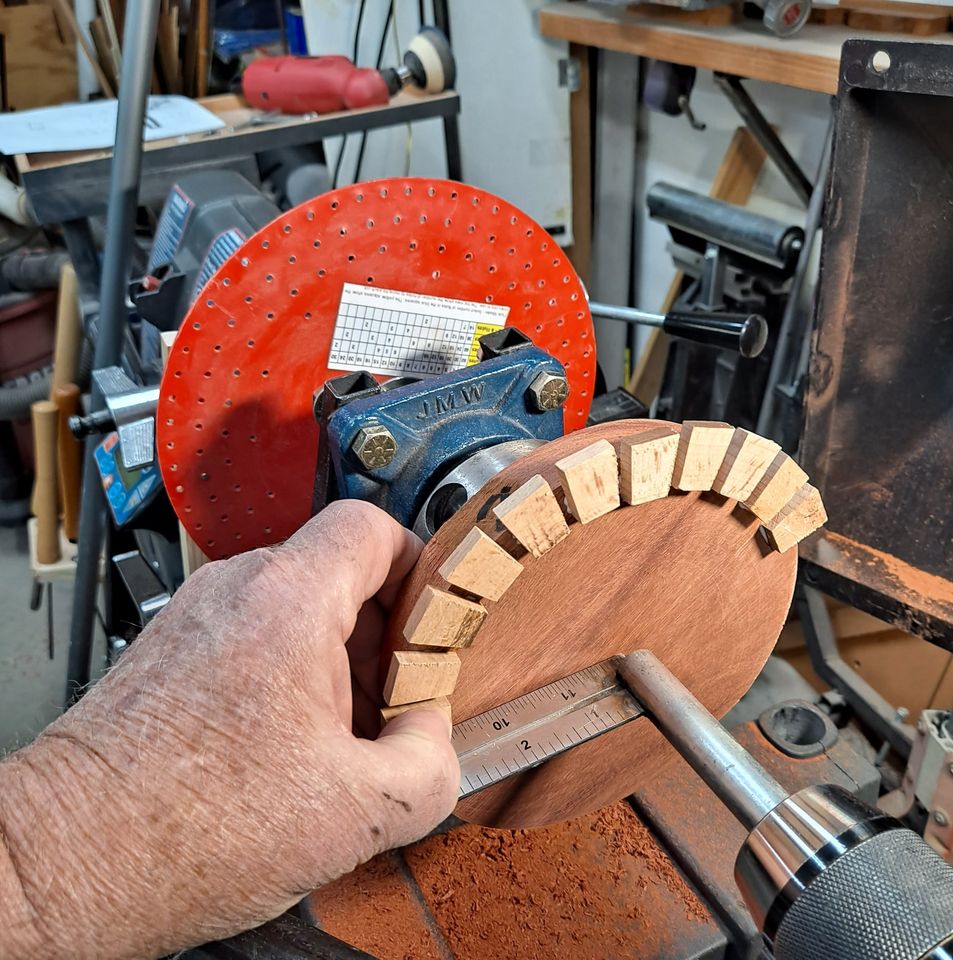
In conjunction with an index wheel to provide the correct spacing around the work piece. Insert the 5/8″ rod into a jacob’s chuck in the tail stock. Use the tool rest to support the ruler. The slider/ruler is used to position each piece at the correct distance from the center of the work piece.
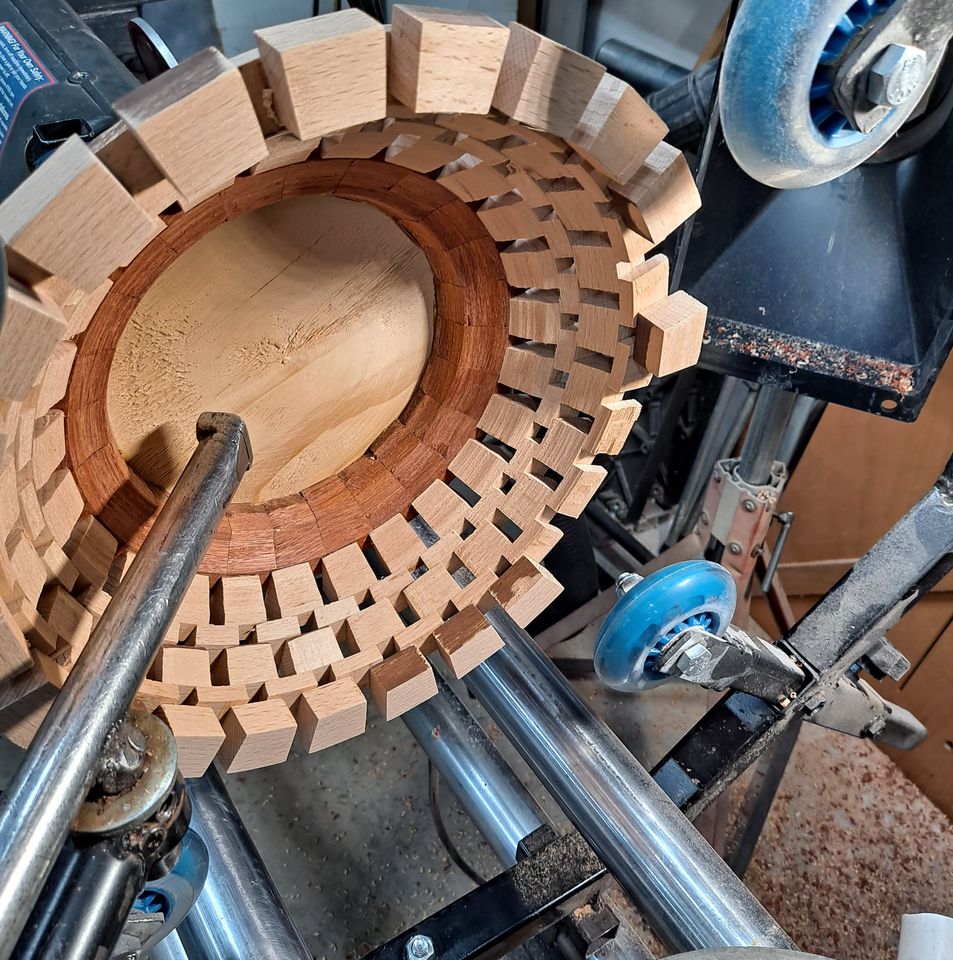
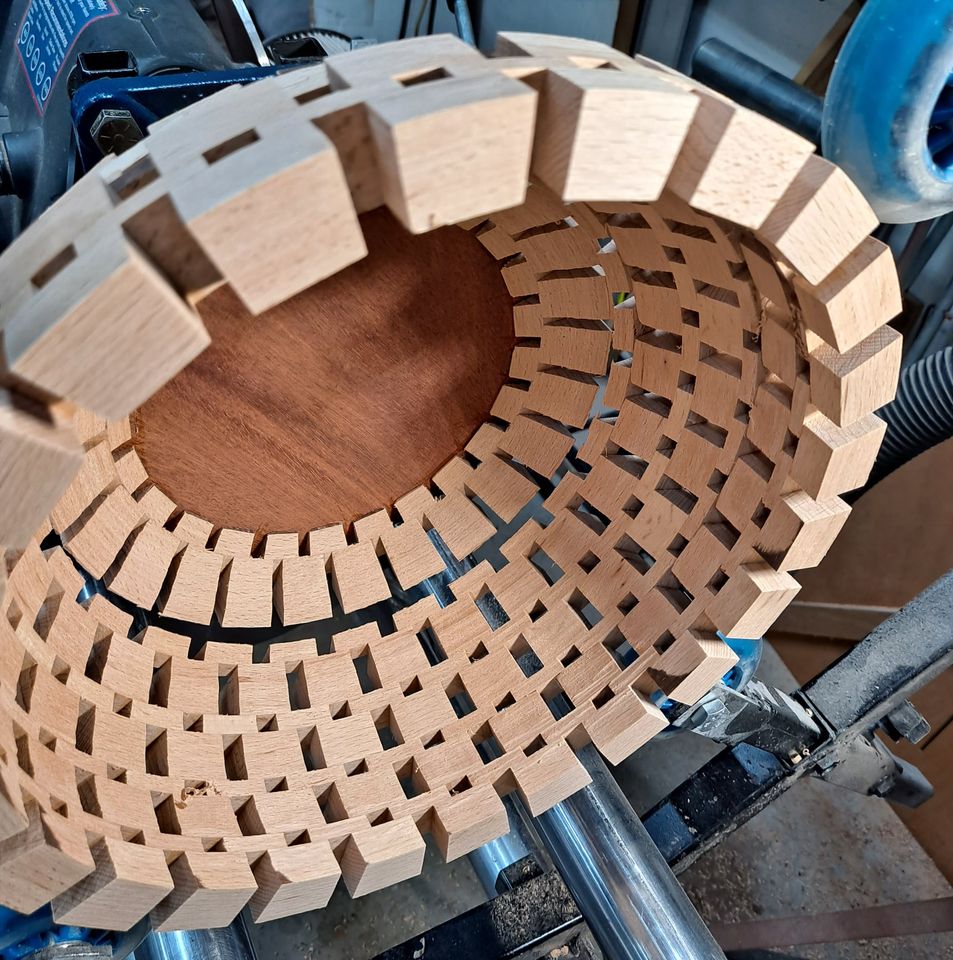
Sequence of pictures:
If I can get an editor for android, I will create a video to provide a demo.
Robert Grinstead