 If you would like your own hardcopy of this description, click here
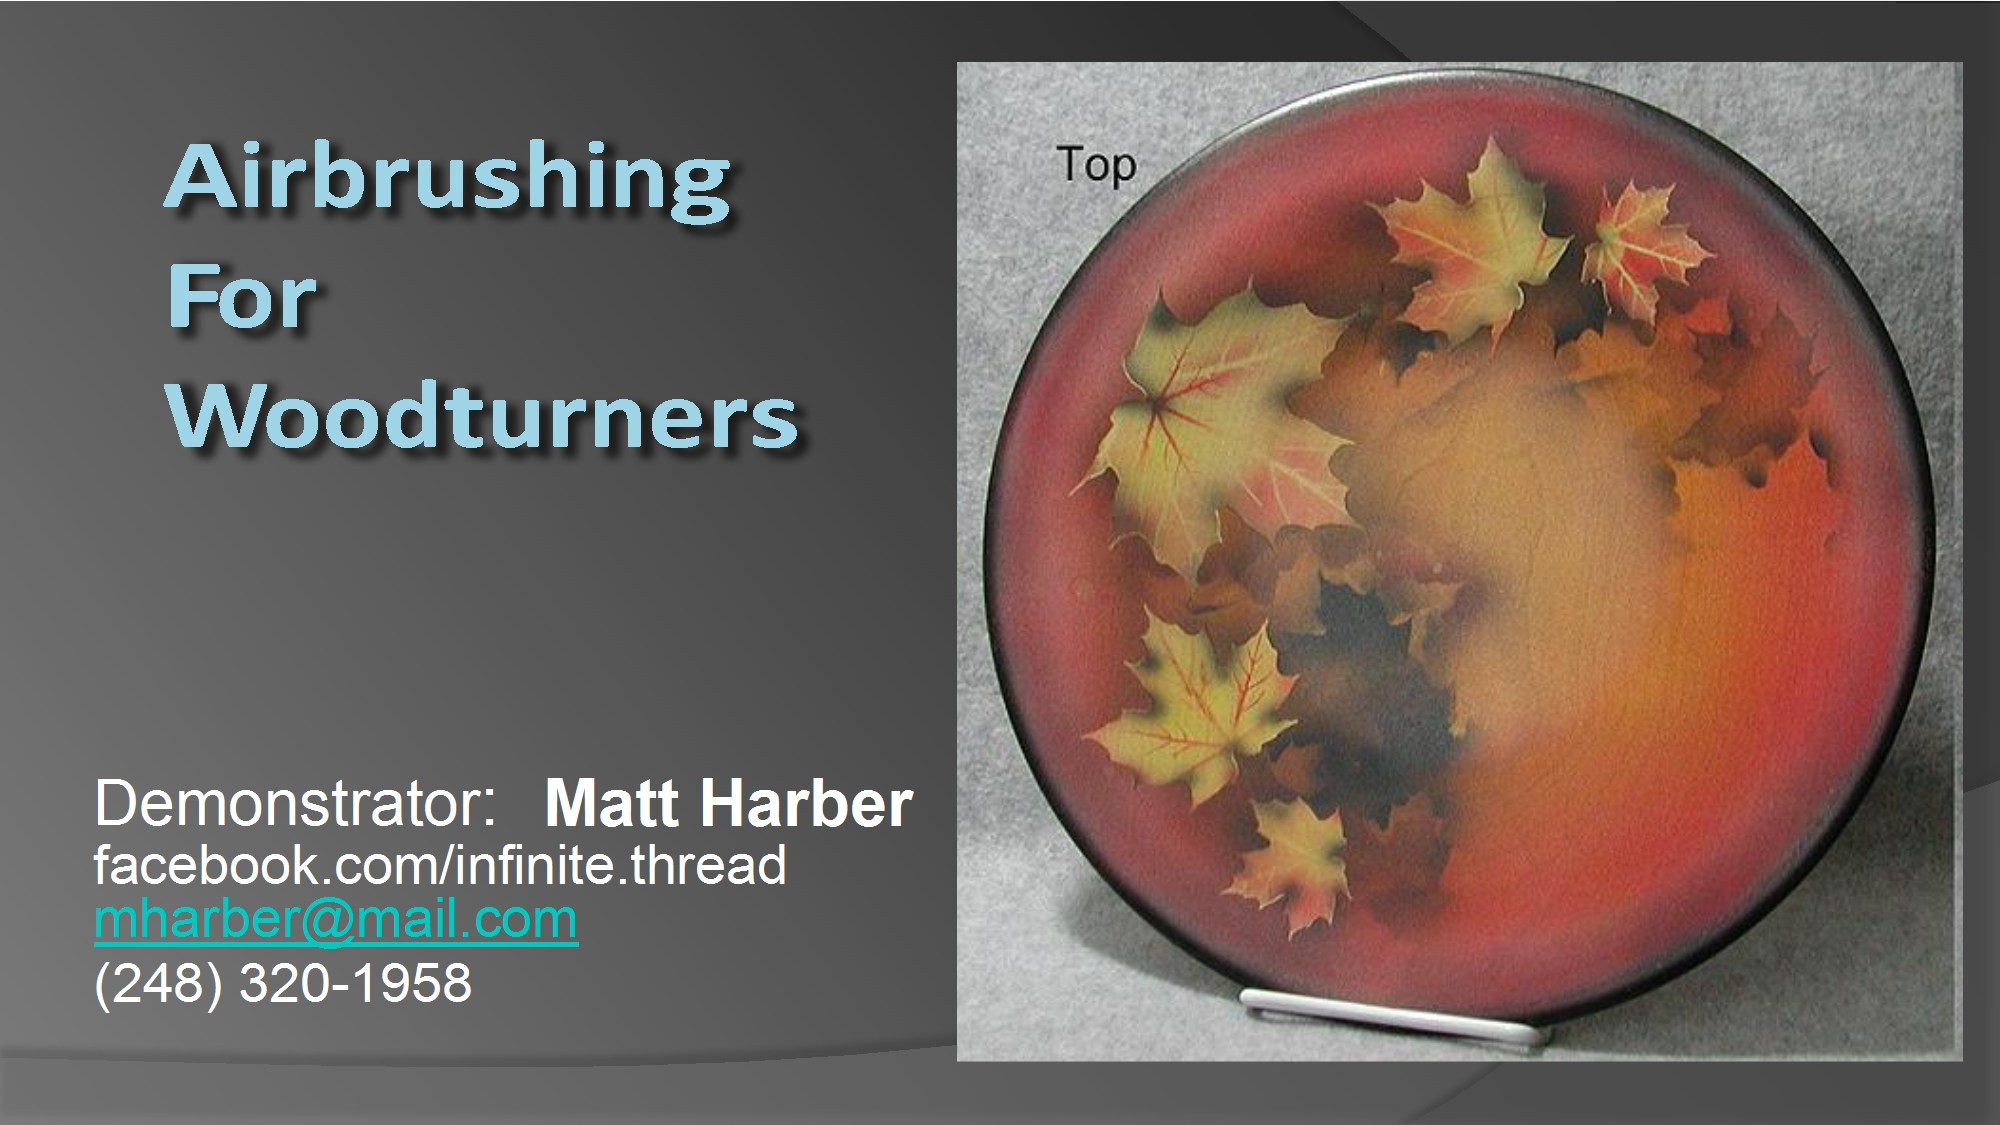
Introduction:
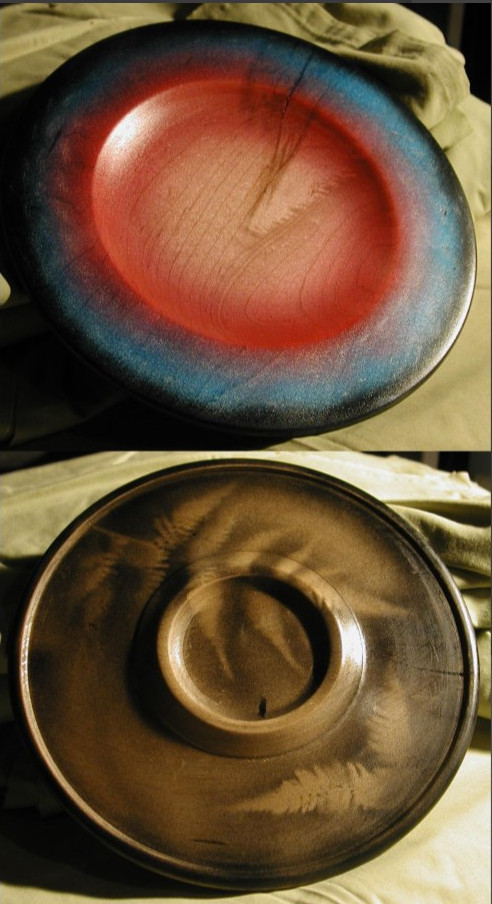
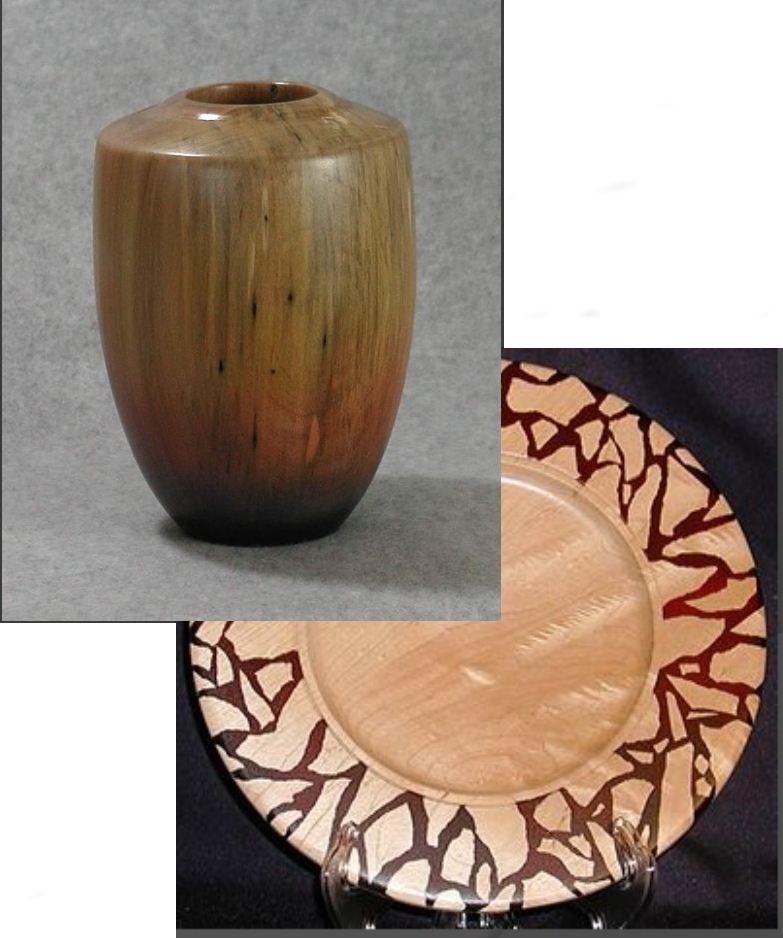
This demonstration will showcase several ideas for using airbrushes on woodturnings. The information presented here is moderately based on the some of the ideas and work of British wood artist Nick Agar. We will cover some basics on painting leaves and using stencils and frisket film (and some other materials).
Notes (page 1):
- Nick builds little dams of masking tape between stencils, if there is more than one open stencil to be painted on the work. This prevents spray from one stencil drifting over onto a nearby stencil.
- Practice first!!! Particularly in building up light coats to get the desired hue and saturation of color. Spraying heavily can cause pooling paint and leaks under the stencils, in addition to increasing drying time.
- Paint must be protected (especially airbrushed places, as the coats are often very thin). A spray lacquer with low acetone or an acrylic fixer, multiple coats, works well. LIGHT coats, from at least a foot away. Be careful, as sometimes additives in the sprays can erode or eat the paints.
- If you are running multiple colors through your airbrush, clean between colors (water or appropriate solvent), and spray light colors to darker colors, if possible.
Notes (page 2):
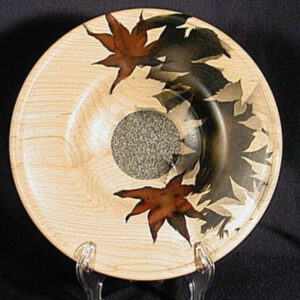
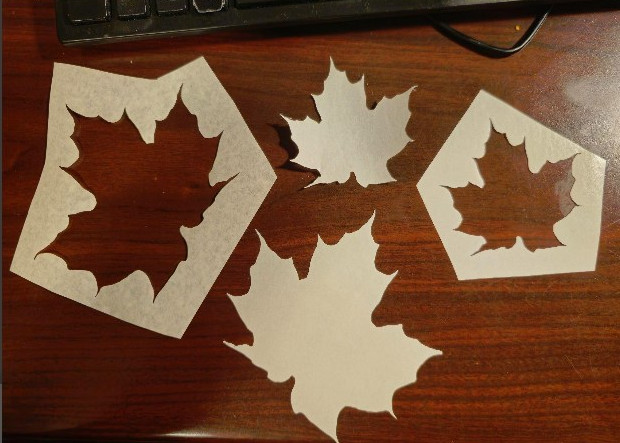
- A good way to make a leaf stencil is to get an actual leaf (from a tree or the ground) that is about the size you would like, and spray around it on the paper covering the frisket. Then you can cut around the outline.
- Save both the positive (the leaf) and negative (the hole) stencil cutouts! You will need them both.
 You can also use vinyl for stencils, especially if you don’t need the precise edges of a stencil (frisket) that adheres to the surface of the work. You can even use contact paper (Walmart).
- You can use most anything with holes in it to spray through, to create various effects. Butterfly nets from the dollar store. Burlap with wide weaves. Torn masking tape.
 You can also use vinyl for stencils, especially if you don’t need the precise edges of a stencil (frisket) that adheres to the surface of the work. You can even use contact paper (Walmart).
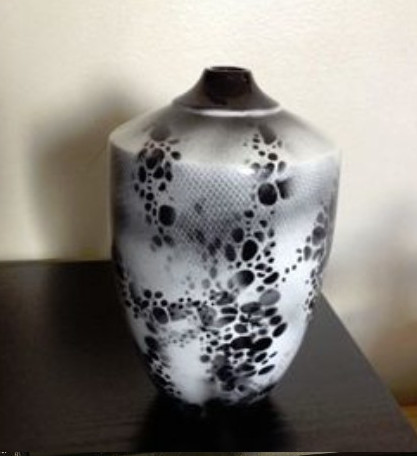
.
Steps:
- Prepare the surface of the work, keeping in mind the space the decorations will occupy.
- Prepare any stencils or masks you will use.
- Apply any stencils (or frisket film). Make sure all the edges are adhering to the piece.
- Mask/cover any parts of the work that are not to be painted/stained.
- Paint/stain.
- When peeling stencils off of wood, be careful to not pull up small parts of the wood, also.
- Repeat steps 2 through 5 as necessary.
- Make sure you clean our airbrush thoroughly when you are done using it!!
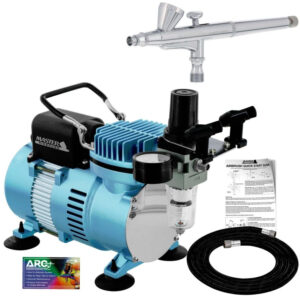
Suggested starter kit:
Basic Airbrush kit ($100) contains:
- One dual-action gravity feed airbrush.
- One air compressor. Has attached water trap and regulator.
- Hose (connect from compressor to airbrush).
- Compressor mounted airbrush holder.
- How-to guide.