
The following documents were provided by Ron Pollmann to accompany his demonstration on 2025-03-05. The documents include 2 PDFs. One contains a graphic description, the second is a detail instructions list. Enjoy.

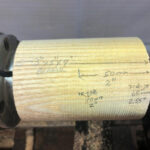 To turn a cupcake box, starting with a blank: 3″ X 3″ X 4″ (76mm x 76mm x 102mm) – maple or other close-grained hardwood
Ron Pollmann’s original video demonstration follows the steps list below.
OperationComments
-
Cupcake base
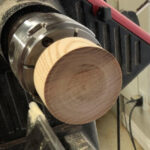
- Mount blank between centers and rough blank round, then make tenon to fit chuck jawsRoughing gouge/parting tool
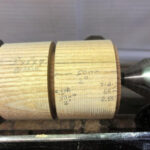
- Reverse mount blank in chuck and mark bottom of cupcake base at 2″ (50 mm) from tailstock endPencil
- Cut 2.6″ (65mm) top diameter of cupcake base and 2″ (50mm) bottom diameter of cupcake base1/8″ Parting tool / caliper
 Cut 1/8″ into blank to left of cupcake bottom to allow room for router tool movement1/8″ Parting tool
- Taper cupcake base in straight line from top diameter to bottom diameter, check with straightedgeRoughing gouge / skew/straight edge
- Flatten top edge of cupcake base about 1/2″ (13 mm) in from edge towards centerSkew
-
Turn cupcake base with 24 flute cuts
- Replace tool rest with router platformRouter platform
- Align tip of router bit with tailstock live centerRouter with 90 degree bit
- Align front edge of router platform with taper of cupcake base, with router bit extending – 1/8″ (3mm) into base —
- Turn off / unplug lathe and wear hearing protectionImportant safety tip
- Bring up tailstock and lock lathe indexer into first indent —
- Move router slowly down length of cupcake base, cutting first fluteSwitch on router away from blank
- Move indexer to second indent and make second router cut —
- Readjust router platform depth into blank until a perfect flute is formed by these first two cuts —
- Move indexer and make all remaining flute cuts —
- Sand flutes, remove dust with brush and clean flutes with denatured alcohol – helps with color saturation240 grit sandpaper/brush/DNA
- Color flutes with Tombow markersTombow markers
-
Hollow cupcake base
- Lid OD: mark top of cupcake base ~1/8″ (3mm) from bottom of flutes, this diameter needs to be ~ 52mmPencil/ruler or caliper
- Mount Jacobs chuck in tailstock with 1.25″ (32mm) Forstner bitJacobs chuck/1.25″ Forstner bit
- Drill hole 1.6″ (40 mm) deep in cupcake base —
- Lid OD: Cut 1/8″ (3 mm) deep lip for cupcake lidParting tool
- Hollow cupcake base to lid ID leaving ~ 1/8″ (3mm) for lid recess, use straw/compressed air to clear chipsScraper / carbide hollowing tool / straw
- Sand inside of cupcake base240/320 grit sandpaper – 500 rpm
-
Part off cupcake base
- Double check depth of cupcake base before next step to ensure you don’t make a funnelDepth gauge
- Cut off cupcake base at about 1 3/4″ (45 mm), slightly undercuting bottomParting tool
 Cut 1/8″ into blank to left of cupcake bottom to allow room for router tool movement
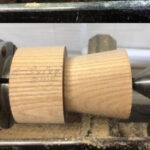 Taper cupcake base in straight line from top diameter to bottom diameter, check with straightedge
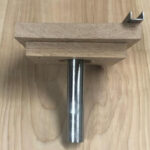 Replace tool rest with router platform
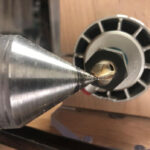 Align tip of router bit with tailstock live center
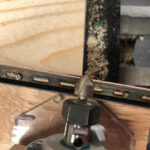 Align front edge of router platform with taper of cupcake base, with router bit extending – 1/8″ (3mm) into base
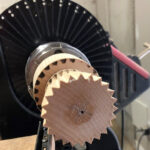 Move indexer and make all remaining flute cuts
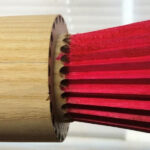 Sand flutes, remove dust with brush and clean flutes with denatured alcohol – helps with color saturation
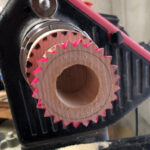 Lid OD: mark top of cupcake base ~1/8″ (3mm) from bottom of flutes, this diameter needs to be ~ 52mm
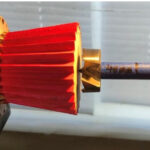 Mount Jacobs chuck in tailstock with 1.25″ (32mm) Forstner bit
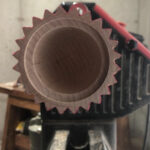 Lid OD: Cut 1/8″ (3 mm) deep lip for cupcake lid
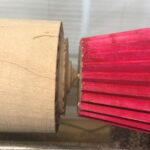 Cut off cupcake base at about 1 3/4″ (45 mm), slightly undercuting bottom
OperationTool / Comments
-
Cupcake lid
- Flatten face of blank that remains in chuckSkew or parting tool
- Measure cupcake base lip OD, set caliper to slightly larger than this diameter Caliper
- Cut tenon on blank to lip OD diameter, testing fit of cupcake base until base fits tightly into lid tenonParting tool / caliper
- Slide cupcake base onto tenon and mark outside diameter of flutes on lid blank Pencil
- Cut from outside diameter line to tenon, depth to match lid recess in cupcake base1/8″ parting tool
- Test fit cupcake base to ensure flutes fit inside lid —
- Cut back tenon to ensure lid fits inside base (lid slightly overhangs flutes), cut small relief on lid tenonParting tool
- Begin shaping top of lid, leaving 1/16″ (1.5mm) to 1/8″ (3mm)outside of flutes for lid overhang3/8″ spindle gouge
- Reverse chuck top and finish dome of lid3/8″ spindle gouge/skew
- Sand lid top, remove dust and clean with denatured alcohol240 grit sandpaper/DNA – 500 rpm
- Use markers to color four concentric rings on top of lidTombow markers
- Texture four concentric rings in top of lid500 rpm
- center ring with knurling tool at centerline of lidknurling tool
- second ring with knurling tool above centerline of lidknurling tool
- third ring with knurling tool below centerline of lidknurling tool
- final ring with knurling tool at centerline of lidknurling tool
- Re-color concentric rings to saturate texturing, if desiredTombow markers
- Remove lid and color bottom or leave naturalTombow markers
-
Finish cupcake base bottom
- Reverse mount cupcake base and clean up cupcake bottomParting tool/skew
- Sand bottom of cupcake bottom, remove dust with brush and clean with denatured alcohol240/320 grit sandpaper, brush, DNA
- Color bottom of cupcake baseTombow markers
- Inside of cupcake base: remove dust, clean with denatured alcohol and color or leave naturalTombow markers
 Flatten face of blank that remains in chuck
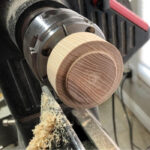 Cut tenon on blank to lip OD diameter, testing fit of cupcake base until base fits tightly into lid tenon
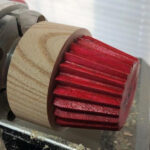 Test fit cupcake base to ensure flutes fit inside lid
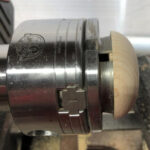 Reverse chuck top and finish dome of lid
 Sand lid top, remove dust and clean with denatured alcohol
 Texture four concentric rings in top of lid
.
The information above is associated with this video of the original Demo by Ron Pollmann.