Featured: Four Column Finial by Howard King

Making a 4 Column Spiral Finial by Howard King


Story and photos by Howard King

Most of this process is based on work by Stuart Moritimer.

Finial marked up
  1. Start with a 2″ by 2″ by 6″ piece of straight grain wood.
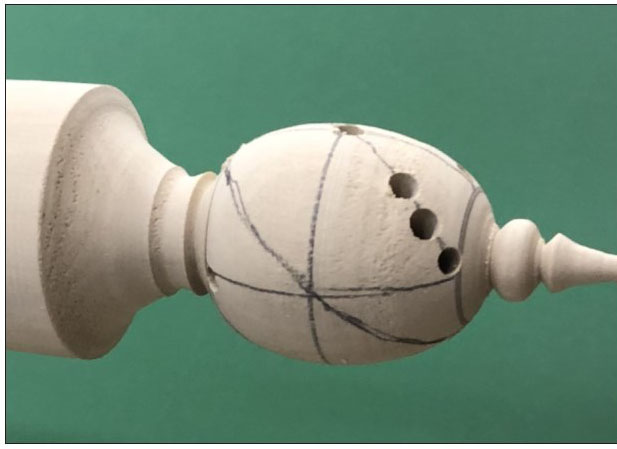
  2. Rough out the placement for the waist and the pointed tip. The section where the spiral columns will be carved should be a shape resembling an egg.
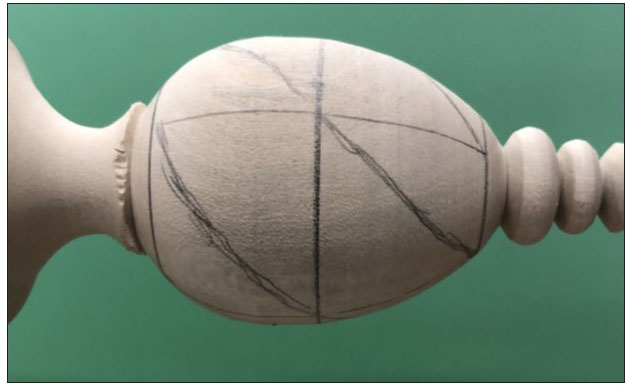
  3. Draw four parallel lines along the axis of the piece (horizonatal) 90 degrees from each other.
  4. Mark vertical lines dividing the egg along the center, and roughly ¼ inch from the top and bottom.
  5. Trace a diagonal line from the intersection of a horizontal and vertical line at the base of the egg up to and through the intersection of the next parallel line and the middle line.
  1. Continue the diagonal line up to the intersection of the next parallel line and the line at the top of the egg. The ends of this diagonal line should end up on the opposite sides of the egg form.
  2. Draw the other three diagonal lines in like manner giving four spiral lines along the outside of the egg. These
    lines represent the spaces between the spiral columns.
Drilling in progress
  1. Using the spiral lines as a guide, drill 3/16″ holes in each of the lines, aiming the drill bit toward the center of the egg.
  2. Use a conical burr bit to connect the drilled holes and open up the space between the columns. Remove as much of the interior of the egg as possible.

Rotory cutting tool fitted with file tip
  1. Use various files to help open up the spaces while trying to make all the columns and spaces as uniform as possible.
  2. Finial and various files
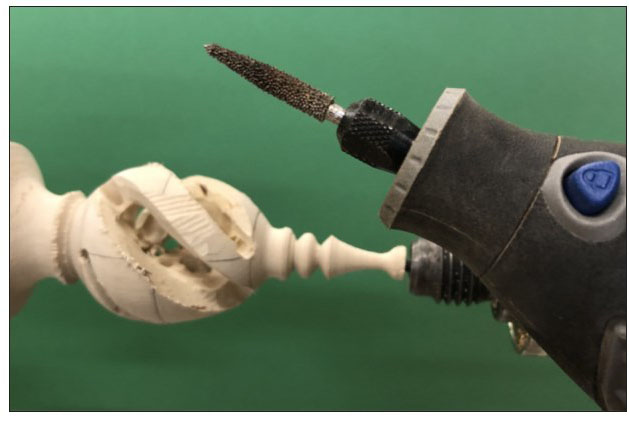
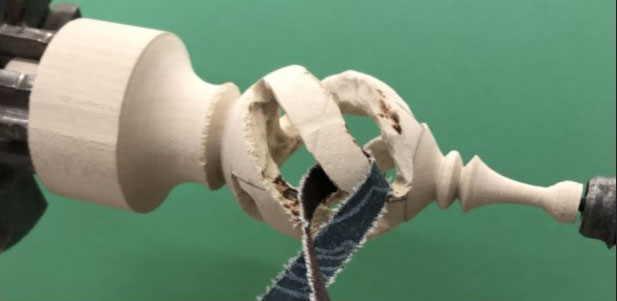
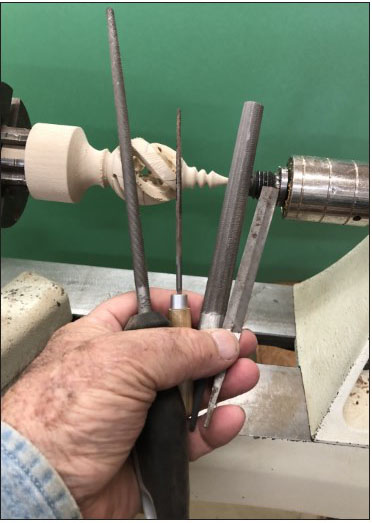
Quarter inch strips of sand paper help sand each of the spiral columns Be extra careful while doing this to not break one or all of the columns. File and sand the areas where the columns come together at the top and bottom of the eggs interior.
Finial being sanded

Finial wrapped in blue tape
  1. Wrap the spiral columns with masking tape to support the fragile columns while you finish and sand the tip and waist of the finial.

Four Spiral column tips:

  • Holly and Maple work well for this project.
  • Keep the piece of wood between centers while working to help give the piece support.
  • An indexing system (either builtin, or shop made) and your tool rest are key to marking out your carving lines.
  • As you carve the columns, keep the space between them consistent.
Finished finial